 Audacity is really a free, easy-to-use audio editor and recorder for Home windows and Mac. A great application to make use of when recording a combination with Serato DJ.
You should use Audacity to:
- Record live audio.
- Edit MP3, WAV or AIFF seem files.
- Cut, copy, splice or mix sounds together.
- Alter the speed or pitch of the recording.
- And much more!
For Home windows customers: skip to presenting Audacity section below
For Mac laptop Professional customers: follow the Audio Setup instructions below
Mac laptop Professional
Altering The Earphone Output right into a Mic Input
Some Mac laptop Pro's possess a dual 3.5mm port. This enables you to definitely change it out from as being a earphone output, right into a Microphone input.
 Without having a dual port, you can just make use of the line in input with no seem preference configuration.
This is how you're doing so:
1. Click on the APPLE within the top left hands corner of the desktop.
2. Navigate to SYSTEM PREFERENCES.
3. Open the Seem preference window.
4. Navigate along towards the INPUT tab.
5. You will notice a drop lower menu “use audio port for: ” Drop this menu lower and choose “SOUND INPUT”. In case your Mac laptop doesn't have this method, it's not able to make use of the earphone port being an input.
6. Close the seem preference window.
The Mac laptop Professional 3.5mm port has become setup like a MIC INPUT, and you're now prepared to begin using Audacity.
Using Audacity
Output or Booth Output, to your computer systems Mic input port.
- (For Mac laptop Professional earphone / microphone port setup make reference to page 3 want to know ,).
 3. Launch Audacity.
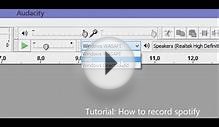
4. You will notice two Microphone symbols.
- One mic chooses the input source. Choose your “Built-In Input / LINE input”
- For that second Mic, click on the triangular beside it and choose “Start Monitoring”
Audacity will be searching for a sound input signal. If your signal exists you will notice two red-colored lines (left, right) pulse up and lower within the metering window. This enables you to definitely monitor how noisy your recording is. Note: At this time you need to see no audio signal.
5. Minimize Audacity.
6. Launch your Serato software.
7. Load a track within the software and begin playing it.
- Take part in the loudest portion of the song, to be able to obtain a good reference for the recording level.
8. Minimize Serato.
9. Return to Audacity.
You need to now visit a monitoring signal on top task bar.
- Beside this monitoring bar you've got a MIC input volume fader.
- Modifying this fader will adjust how noisy you record your mix.
- Recording too noisy can lead to distortion / a poor sounding mix.
RELATED VIDEO


Share this Post
latest post
-
 Free virus software for Windows XP March 29, 2020
 -
 Mac Drafting software free August 19, 2015
 -
 Mac audio editing software January 14, 2016
 -
 Architectural drawing software Mac June 13, 2016
 -
 PC Cleaner for Mac October 20, 2014
 -
 Best free antivirus Vista January 18, 2017
 -
 Audio editing software for Mac June 29, 2016
 -
-
 Best free antivirus for Laptops January 14, 2016